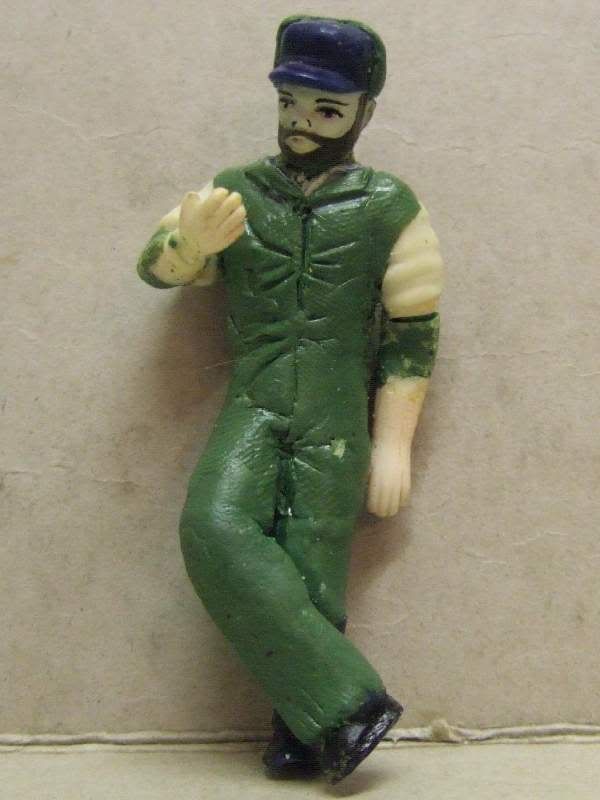
OK, no need to panic dear reader, I have not suddenly gone 'off the rails' - to be in my mental state requires years of sustained abuse anyway. But away with such trivia for the moment...
No, this small (and probably welcome) departure from matters pertaining to Badman Pipe Factors will hopefully show how I have gone about sculpting my own figure. In truth, the end result may well find gainful employment somewhere in the yard, but for now let us not dwell too much on that.
Now model figures are of course not confined to the domain of railways - they are pretty much the stock-in-trade for your average wargamer, for example. It follows, therefore, that the practice of sculpting figures is quite widespread, and indeed some fine web-sites are to be found without too much effort.
The techniques, as one might imagine, are many and varied, as are the available sculpting materials. Being a newcomer to this sort of thing, I had doubts about my ability to produce a figure from scratch. So, I decided to cheat. Well, probably overstretching the term really, but in short my idea was to take an existing figure and alter its pose in some way, whilst at the same time adding some modest detail.
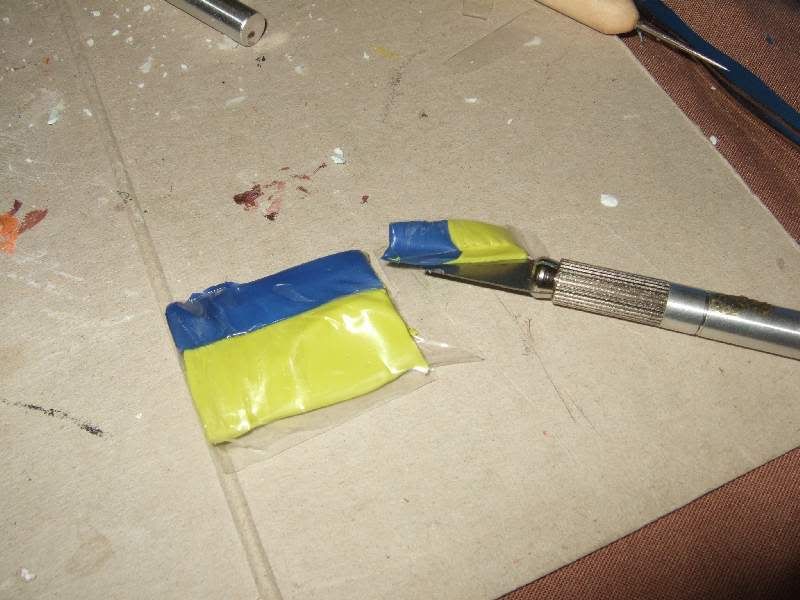
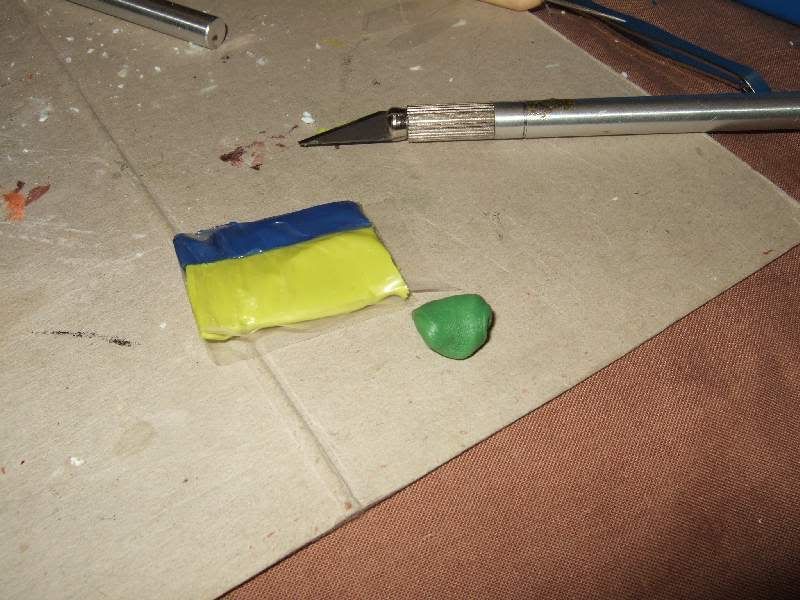
But with what? Well there are lots of materials available, under a variety of brand names: Sculpey, Fimo, Milliput (which is a two-part sculpting/carving/filling material), and a substance called 'Kneadatite Duro', but which almost universally known (amongst we sculptors!) by the name of 'Green Stuff'. Green Stuff starts out life as a strip of yellow and blue 'putty', which remains soft until such time as it is mixed to a consistent green. Once mixed, you have about 2-3 hours in which to mould, sculpt or otherwise shape it before it cures. Even when cured it is slightly flexible, but is firm to the touch and takes paint readily. When exposed to a nominal heat source - such as a table lamp - the curing is accelerated.
OK I admit it - I'm rubbish at explaining stuff in words, so here is a sequence of photos which should clarify things somewhat:
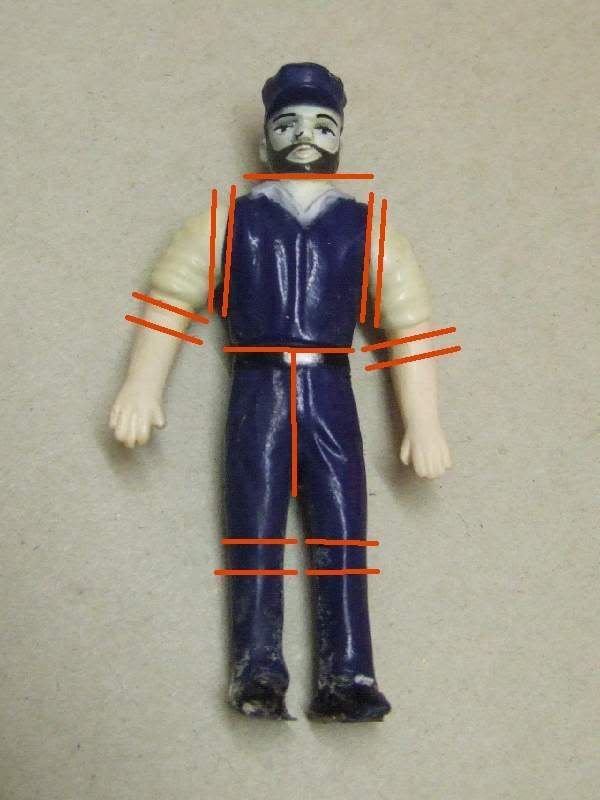
First, please welcome our victim - err, I mean - hero. His name is Dave. The intention is to transform Dave from a somewhat toy-like blob of plastic to a fine upstanding individual, who, once I am done will in all probability be seen leaning casually against a wall reading a book.
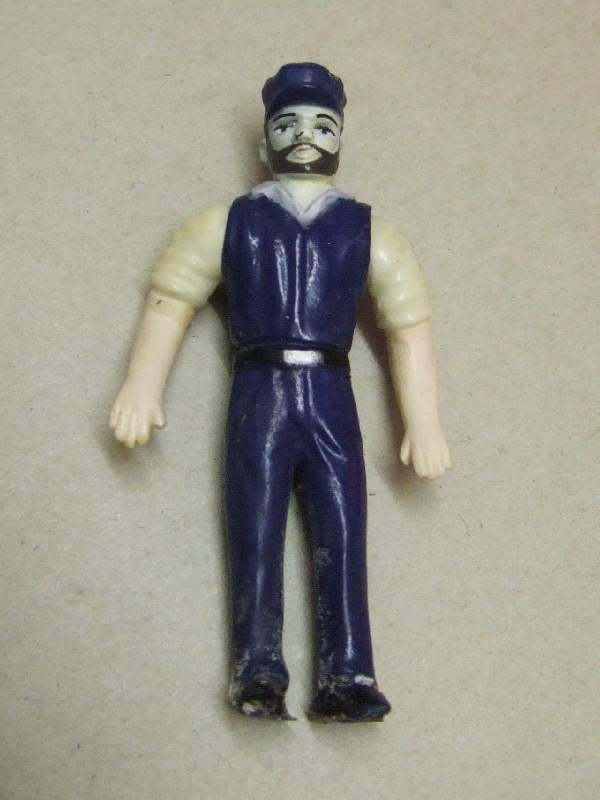

Now in rearranging the figure's pose, I must, however reluctantly, take the rather drastic step of dismembering the body - that is, separating the head, arms, legs, hips and torso..... Dave, where are you going, this won't hurt I promise.... Furthermore, I need to cut the arms at the elbow and the legs at the knees. Given that I also want to effectively 'cross' one leg over the other, I need to split the hips down the middle from front to back. I bet you winced involuntarily then, didn't you? Here's the same picture with the intended cut lines:
Notice that I am effectively removing the elbow and knee sections completely. If I don't do this, then when I try and introduce a bend in the limb, the overall length of it will look wrong. I am also taking this opportunity to lose the 'body-builder' look by removing the excessively broad shoulders.
OK, down to cases... Nurse, the screens please... scalpel.... forceps.... lager.... Oh dear! It was at this point that I encountered my first hurdle - in dismembering the body, I discovered that Dave is a rather hollow individual! This was hastily resolved by filling his abdominal cavities with an air-drying clay. I could have used Green stuff, but at £5 for a miniscule amount I thought that would be something of an extravegance.
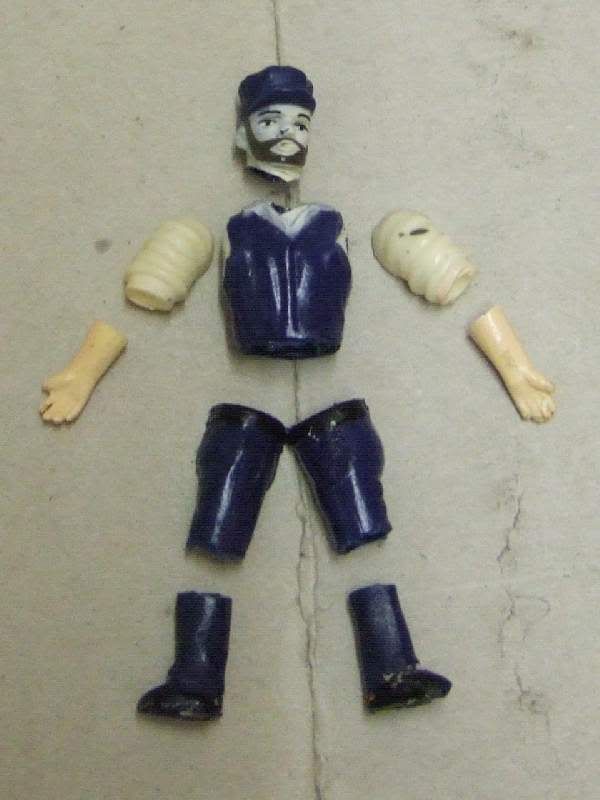
You may very well question the need to fill the cavity anyway - in fact the only reason I had for doing it was to have something into which I could insert some soft iron wire. This wire is intended to act as a skeleton on which to put the Green Stuff, and to hold the original parts together in the desired pose whilst the Green Stuff cured.
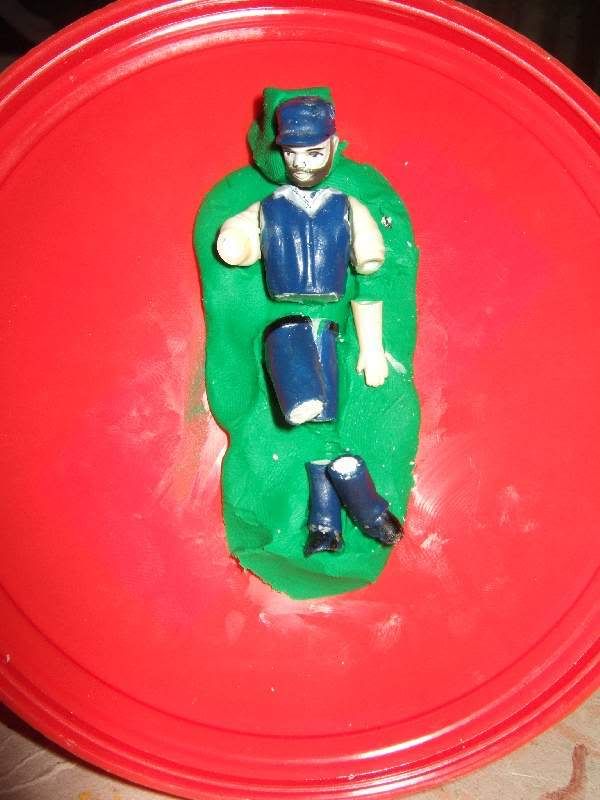
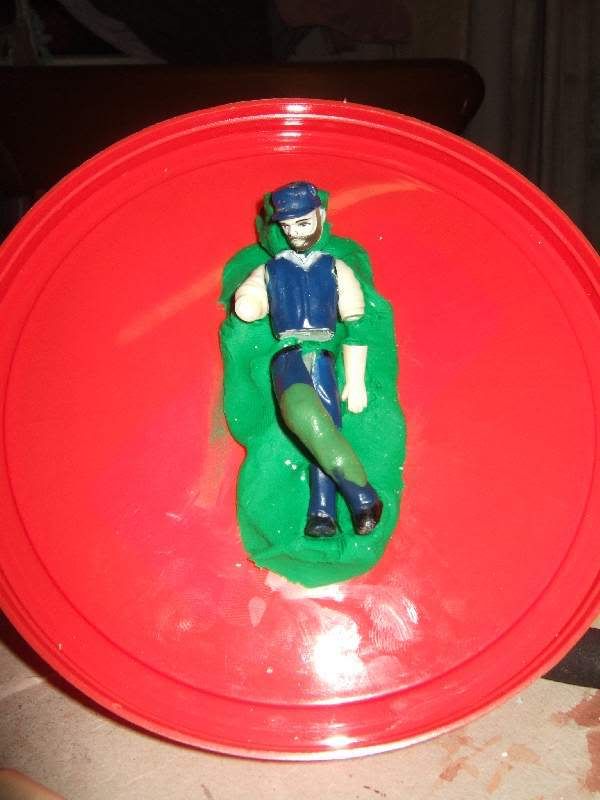
With the body cut up and the cavities filled with clay, I then set about trying to arrange the parts back in the desired pose. Enter another modelling material beloved of children (and modellers) all down the ages - Plasticene. I set up a 'bed' of Plasticene and used that to support the assorted body parts in their intended positions:
So, to the Green Stuff! Here it is, in its 'raw' state:
So I then set to joining the various parts back together, using the Green Stuff - starting with the legs, as shown below:
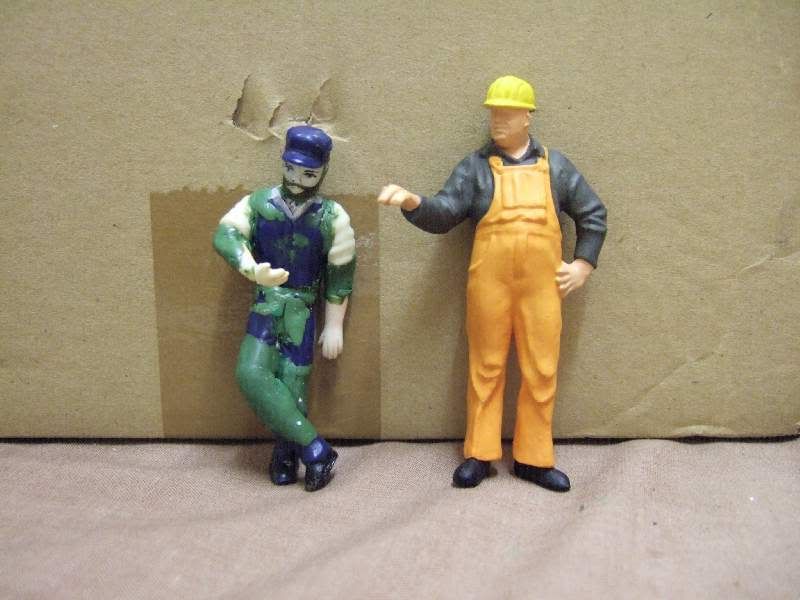
In doing this, it occurred to me that Green Stuff can be quite tacky, and can have a tendancy to stick to fingers when it has no business doing so. With that in mind, I decided that once the basic body shape had been rebuilt, I would allow the figure to cure before proceding any further. Here's the end result, with a Preiser figure for company (and by way of a comparison); a slight difference in height I guess, but then that's people for you!
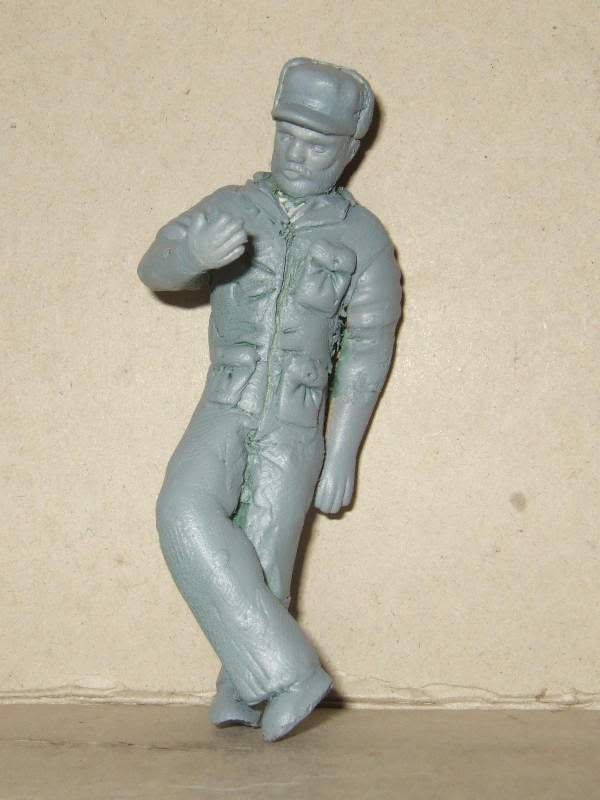
After 24 hours of curing, the Green Stuff had solidified, yet was still easily carved, scraped and filed to shape. Additionally I was able to start adding some details - in this pic you may be able to make out some lapels on his overalls, as well as some 'flaps' on his hat, to keep his ears warm on cold days!
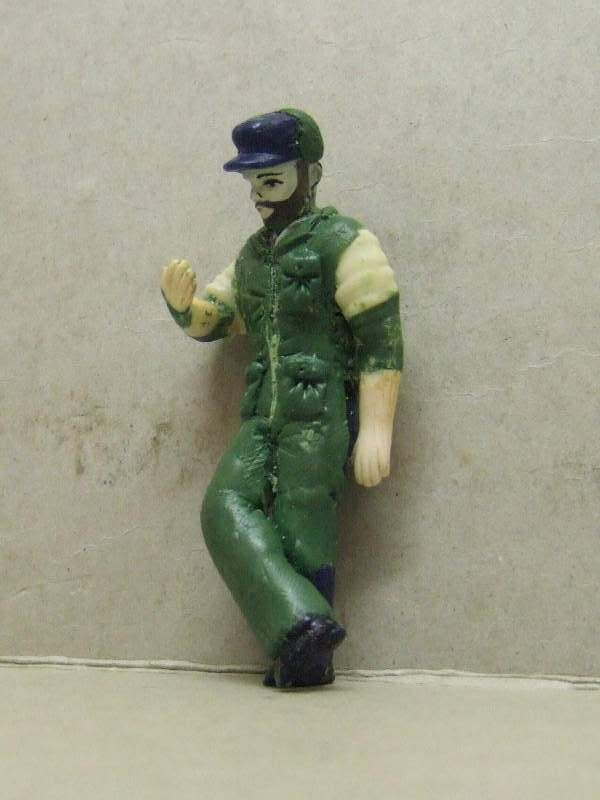
Finally, 24 hours later I decided to quit while I was ahead, and spray-primed our much-improved (in my humble opinion, anyway) character with grey undercoat:
All ready for painting!
This is my first foray into sculpting, and whilst I freely admit it's not a perfect result I must confess I am actually very pleased with it. It's certainly an improvement on how it started. The next time you see our Dave, he'll be all suited and booted, earning his corn at a well-known pipe factory!
